Posting to multiple LinkedIn groups using Power Automate
A step-by-step video using Microsoft Power Automate to send data from Excel to many groups on LinkedIn. The walkthrough shows how to make a Flow that can post to both Public and Private groups. It also includes a quick way to ensure your posts can be different to not make LinkedIn mad about you spamming the same content.
TUTORIAL
Mike Conley
6/27/20242 min read


Send post to many LinkedIn groups

Windows 11 (10 may work, but no promises)
Power Automate
On many Windows 11 machines, Power Automate may already be installed. If not, you may get it from Windows Store or download as an MSI.
Download from Windows Store
https://www.microsoft.com/store/productId/9NFTCH6J7FHVInstall from MSI
https://learn.microsoft.com/en-us/power-automate/desktop-flows/install
Note: When installing, do not choose to link to web version.
Install Microsoft Power Automate browser extensions and enable it.
Microsoft Excel
Prerequisites
The video below is a step-by-step walk-through using Microsoft Power Automate to send data from Excel to many groups on LinkedIn. The walkthrough shows how to make a Power Automate Flow that can post to both Public and Private groups. It also includes a quick way to ensure your posts can be different to not make LinkedIn mad about you spamming the same content.
The purpose of the video is to help reduce the burden and time of posting to many LinkedIn groups. Its intent is to help productivity and should not get used for nefarious purposes or for sending to hundreds of groups.
After you watch the video, be sure to check out the resources I've included at the end of the post.
If the content of this article helps you out, how about helping me out by buying me a coffee.
Resources


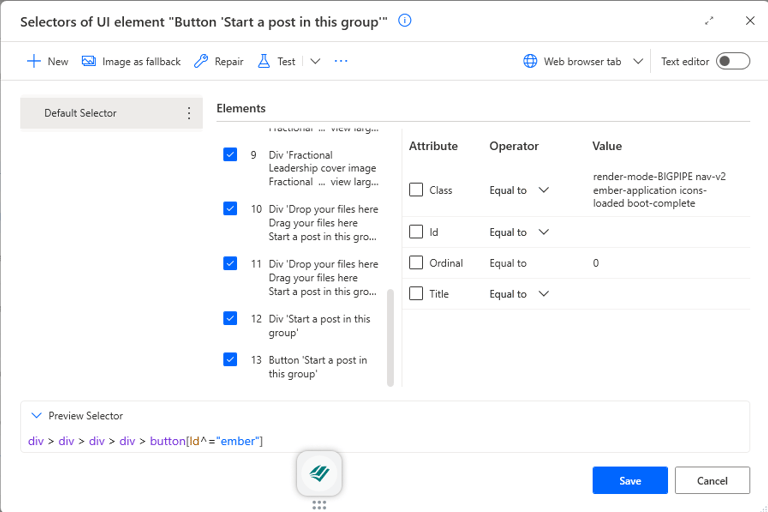
Press Button on Web Page - Start a Post


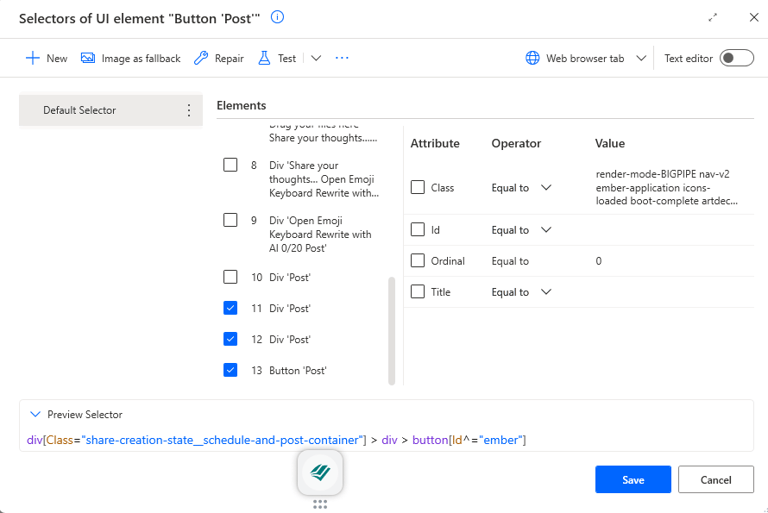
Press Button on Web Page - Post
Press Button on Web Page - Post


Web and UI selected Elements
Sharing my Flow
With the free version of Power Automate, you cannot share a Flow by sharing some file. That is only available when you have a bigger business or educational license and Power Automate Desktop is linked to the web version.
However, you can copy and paste. When you copy your whole flow, you can paste that into a text file. Here are the steps:
Open your Flow you want to copy
Use cntrl+A to select everything
Right Click on the flow and select Copy
Open NotePad and start a new Text Document
Use cntrl+V to paste the text
Save the Text Document
To use the text on a different computer:
Copy the text file to another system
Open the text file with NotePad
Use cntrl+A to copy all the text
Create a new Flow in Power Automate
In the Flow, Right Click and choose Paste
Here is a text file copy of what I did in the video. You're welcome! 😁

If the content of this article helps you out, how about helping me out by buying me a coffee.
